
Last weekend, when I was heading to a spooky Girls Night in Hubbardston with my lady friends, I had mentioned that I was baking a bunch of Halloween-inspired desserts to bring with me and feed a crowd (we had a little potluck style meal with everyone!) and that I was looking forward to sharing the quick and easy way I put it all together once it was all said and done.
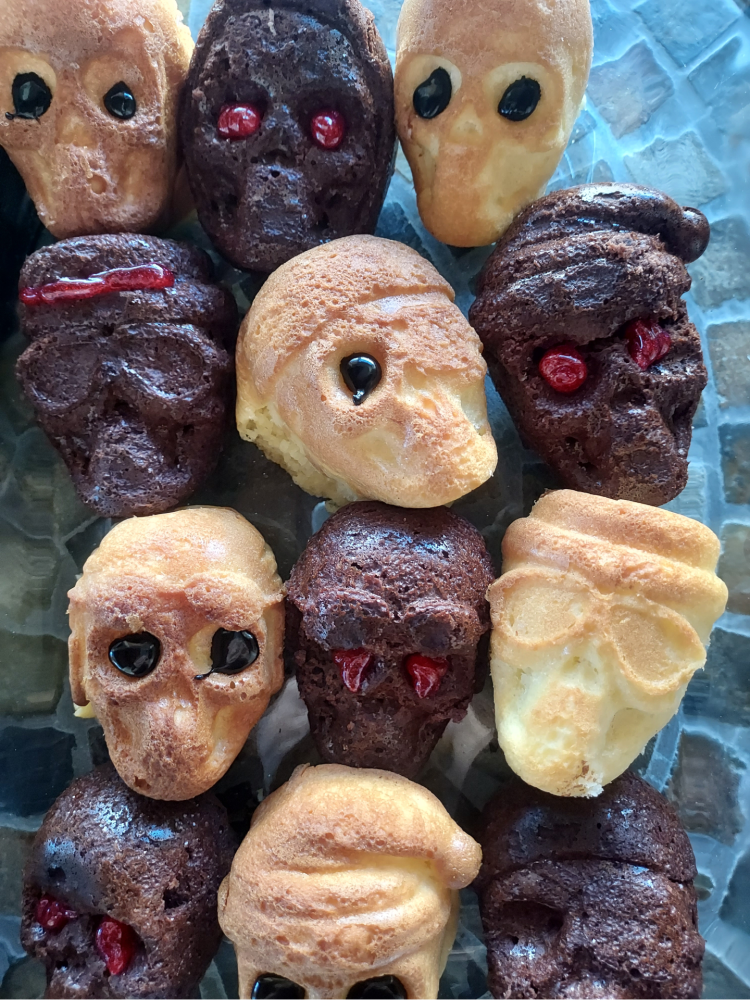
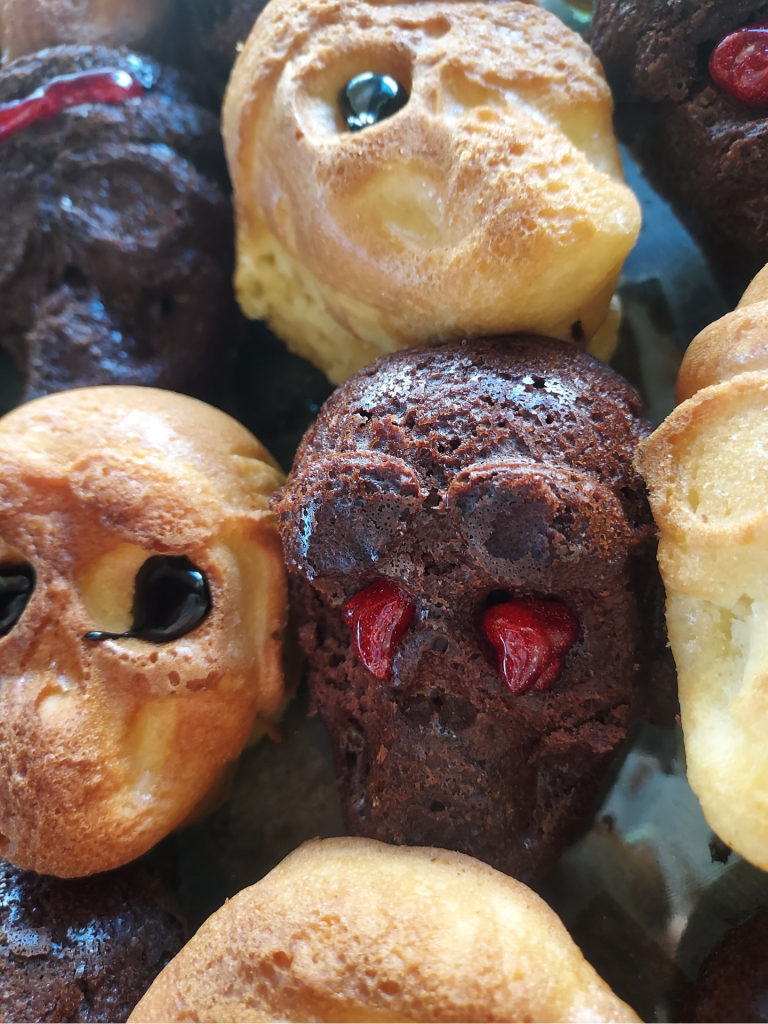
My contribution to the event was a series of various skull-shaped cakes and brownies – big enough to fit in the palm of your hand, dense enough to be a filling treat, and lightly decorated (since not everyone likes a lot of frosting or icing!)
And all of it was thanks to finding the perfect, non-stick silicone molds. I had purchased THESE ONES from Amazon a couple of weeks before the get-together in preparation of a lot of baking since they come in a set of two, 6-skull molds – and the assembly and cleanup couldn’t have been easier!
Also – I used boxed cake and brownie mixes for this one since I had a time limit to get these done – and they tasted just fine!

WHAT YOU’LL NEED:
36 SERVINGS:
- Two, six-skull silicone molds (linked above!)
- 1 dozen eggs (I used 10 eggs total, but it’s good to have a couple of extra ones, just in case!)
- One 24oz bottle of vegetable oil (you’re not going to use the whole thing, but it’s better to have more than less!)
- 2 boxes of Betty Crocker Dark Chocolate Cake mix.
- 2 boxes of Betty Crocker White Cake mix.
- 2 boxes of Betty Crocker Fudge Brownie mix.
- Icing/Frosting and edible decorations of your choosing.
- 1 jar of Trader Joe’s Cinnamon Bun Spread
WHAT YOU’LL DO:
1. Preheat your oven to 350°F. This temperature will be the same for all of the boxed mixes. Lightly grease the molds with butter or a cooking spray before each use.
2. Prepare the cake mixes as instructed. I did one box at a time. The cake mixes filled both 6-skull molds completely, whereas the brownie mix only filled one of the molds in it’s entirety due to the batter being a little thicker. If you want more brownies, you should grab an extra box and a couple more eggs!
3. Place the filled silicone molds flat onto a baking sheet to prevent the batter from spilling out and over into your oven as they heat up and the cakes/brownies begin to rise. Slide the baking sheet carefully into the oven, and cook for the appropriate time. For the cake mixtures, mine were done in about 20-25 minutes. The brownies were done in about 40-50 minutes.
4. Remove the baking sheet & molds from the oven and let cool before carefully popping the skulls out of the molds. From here, you can begin decorating. Since each skull in these molds were different, I used black and red icing to accentuate the eyes/features. If any of the cakes/brownies broke while being removed from the mold, I used the red icing to “glue” them back together with a bloody effect.
5. When serving, spread a layer of the Cinnamon Bun Spread onto your plate/tray and assemble the skulls the way you want on top of the spread. People can dip or swipe their cake in the spread before eating. I also left the jar next to the skulls in case anyone wanted to put a little more on theirs!
____________________
All together, the baking and decorating only took me a couple of hours – and these were a hit! Not only did my friends and some of the guests I was meeting for the first time appreciate that they weren’t covered in frosting, sprinkles, candy, etc., but they seemed to like how big each cake was, too!
These molds can be used to create skull-shaped pizzas and cookies, as well – which is going to be my next attempt in the coming days/weeks, I think!
Enjoy your weekend, everyone!
xo
